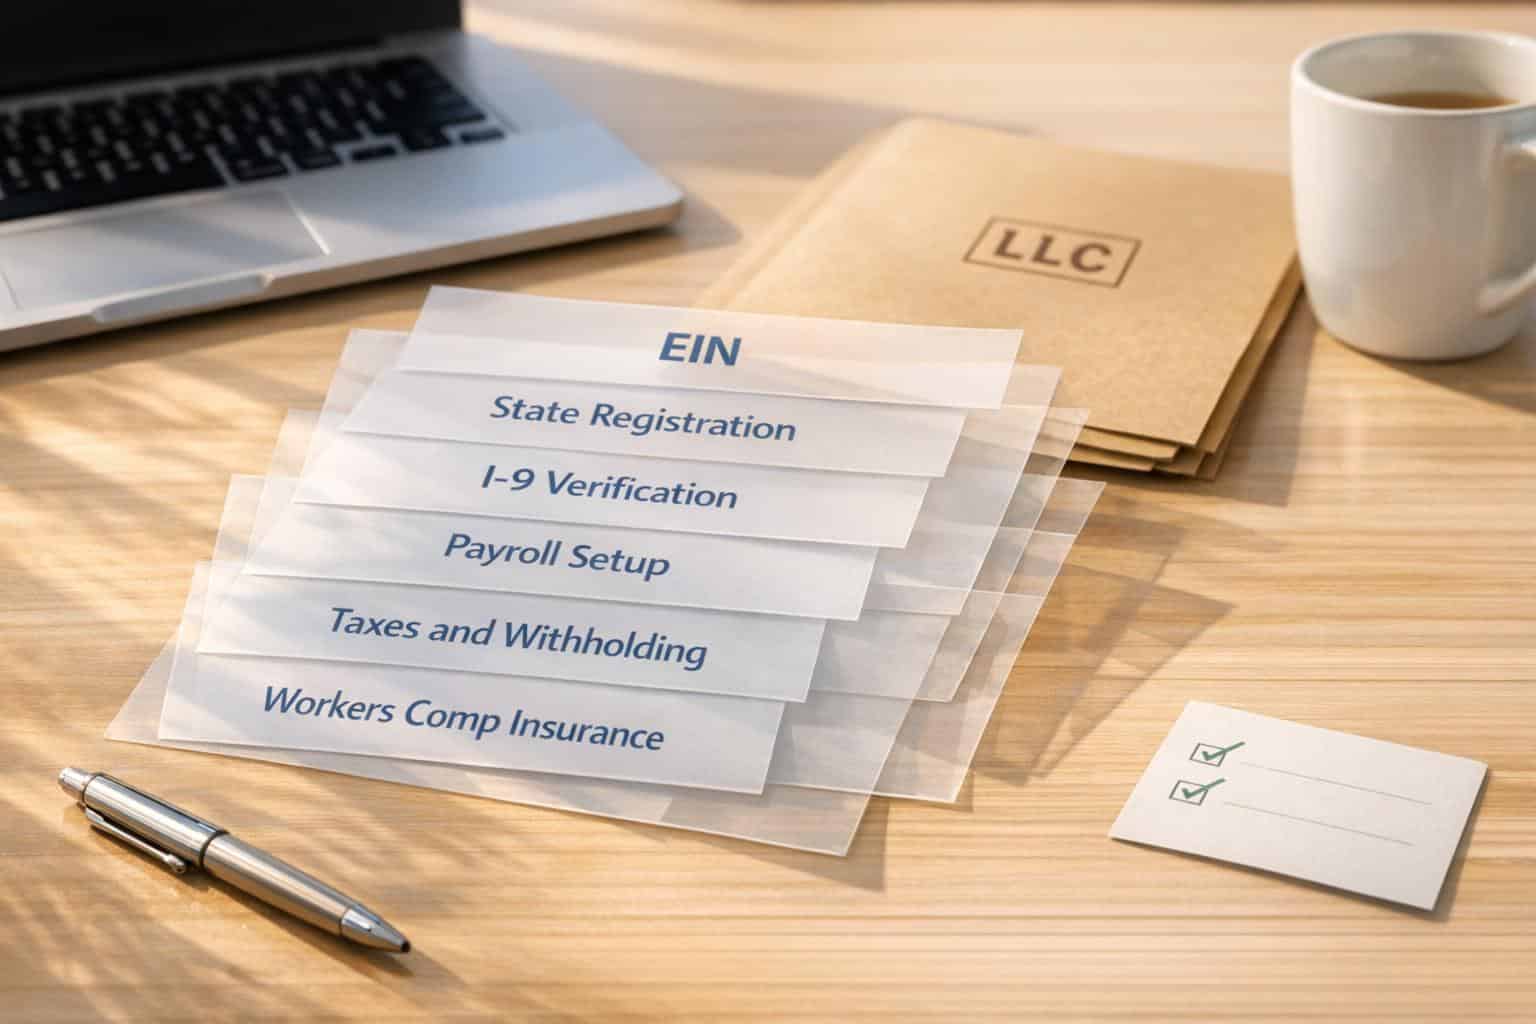
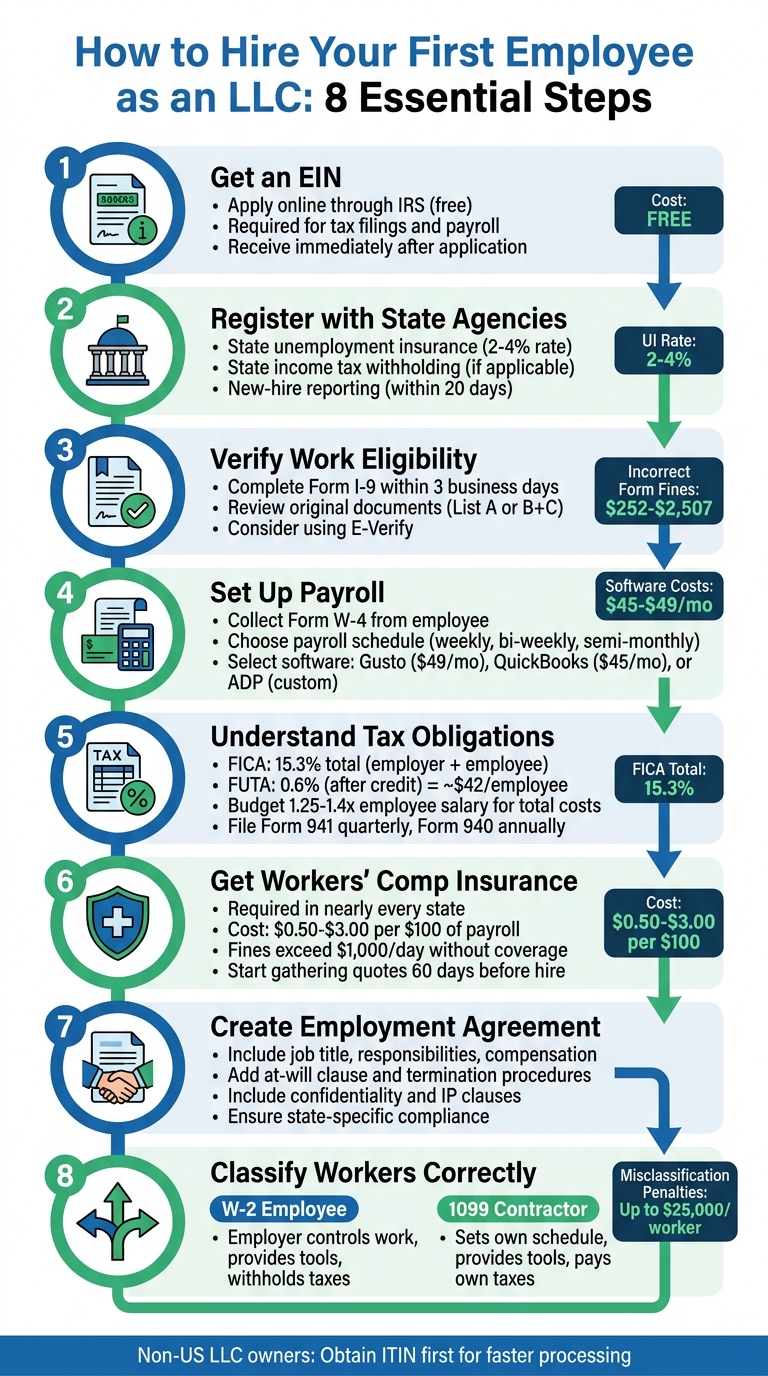
Hiring your first employee as an LLC involves more than just offering a paycheck. You’ll need to navigate tax registrations, compliance rules, and payroll setup to get everything in order. Here’s a quick breakdown:
- **Get an EIN for your LLC: Required for tax filings and payroll. Apply online through the IRS for free.
- State Registrations: Sign up for unemployment insurance, income tax withholding (if applicable), and report new hires.
- Verify Work Eligibility: Complete Form I-9 within three days of hiring and consider using E-Verify for extra assurance.
- Set Up Payroll: Choose between manual processing or payroll software like Gusto, QuickBooks Payroll, or ADP RUN.
- Understand Taxes: Manage FICA, FUTA, and state-specific taxes. Budget for 1.25–1.4x the employee’s salary to cover additional costs.
- Workers’ Compensation Insurance: Mandatory in most states to cover workplace injuries.
- Draft Employment Agreements: Clearly outline job details, pay, and policies. Ensure compliance with state laws.
- Classify Workers Correctly: Misclassifying employees as contractors can result in penalties.
Each step ensures compliance, protects your business, and helps you manage costs effectively. For non-US LLC owners, additional steps like obtaining an ITIN as a non-US entrepreneur may apply. Payroll software or services can simplify much of the process.
Step 1: Get an Employer Identification Number (EIN)
What is an EIN and Why Do You Need One?
An Employer Identification Number (EIN) is a nine-digit number assigned by the IRS to identify your business for tax purposes. Think of it as your LLC’s version of a Social Security Number – it’s how your business is recognized for tax-related matters.
If you’re running a single-member LLC, you may have been using your personal Social Security Number up to this point. But once you hire your first employee, getting an EIN becomes a legal requirement. This applies to all LLCs with employees, whether single-member or multi-member. Without an EIN, you can’t legally process payroll, withhold federal income taxes, or handle Social Security and Medicare taxes.
Your EIN is also necessary for filing important government forms like Form W-2 (to report employee wages) and Form 940 (for federal unemployment taxes). Beyond that, it’s required to register with state labor agencies, set up workers’ compensation insurance, and even open a business bank account. Simply put, your EIN is a key piece of the puzzle when it comes to hiring and managing employees.
How to Get Your EIN
The quickest and easiest way to get an EIN is through the IRS online application. It’s a simple process, and you’ll receive your EIN immediately after completing the form. You’ll need to provide details about your business structure (e.g., LLC or corporation), the responsible party, and a valid Taxpayer Identification Number, such as your SSN or ITIN.
If your LLC already has an EIN, there’s no need to apply again. Multi-member LLCs usually obtain an EIN during their formation, while single-member LLCs sometimes skip this step until they need it.
The IRS application is completely free. If you’d prefer some assistance, services like BusinessAnywhere offer EIN application help for $97. They’ll handle the paperwork and ensure everything is completed accurately, which can be helpful if you’re unsure about the process.
You can also apply by phone, mail, or fax, though these methods take several weeks to process. Once you have your EIN, you’ll be ready to complete state registrations and set up payroll systems. It’s a crucial step that sets the stage for hiring and complying with tax laws.
Step 2: Register with State Labor and Tax Agencies
Once you’ve got your EIN, the next step is registering with your state’s labor and tax agencies to officially set up your LLC as an employer. This process includes signing up for state unemployment insurance (SUTA or SUI), state income tax withholding (if applicable), and new-hire reporting. These registrations are required by both federal and state laws before you can process payroll.
State Unemployment Insurance (SUI)
Your first task is registering for state unemployment insurance. Every state requires employers to contribute to an unemployment fund that supports workers who lose their jobs. When you register with your state’s Department of Labor, you’ll receive a state employer ID and a tax rate. For new employers, the starting rate usually falls between 2% and 4% of wages. For example, in California, new employers pay a 3.4% SUI tax on the first $7,000 of each employee’s wages. This translates to a maximum of $434 per employee annually.
State Income Tax Withholding
If your state collects income tax (41 states do), you’ll also need to register with the Department of Revenue to set up withholding. Some states simplify the process by offering a unified portal for registration, while others require separate registrations with both the Department of Labor and the Department of Revenue. To find the correct portal, search online for something like "[Your State] new employer registration."
New-Hire Reporting
Federal law mandates that every new hire must be reported to your state’s designated agency, typically within 20 days of their start date. This reporting helps with child support enforcement and combats unemployment fraud. You’ll need to provide details like the employee’s full name, address, Social Security Number, and hire date, along with your business information and EIN. Many payroll software solutions, such as Gusto or QuickBooks Payroll, can handle this reporting for you automatically, saving time and ensuring deadlines are met.
Staying Compliant
Keeping up with state compliance can feel overwhelming, especially as regulations and deadlines evolve. Services like BusinessAnywhere can help. For $147/year, they offer a company maintenance service that assists with ongoing compliance, annual requirements by state, and state tax registrations. This can be a great option if you want to avoid penalties and ensure your LLC remains in good standing without juggling every detail yourself.
Once your state registrations are squared away, you’re ready to move on to verifying employee work eligibility in Step 3.
Step 3: Verify Employee Work Eligibility (Form I-9 and E-Verify)
Before a new hire can begin working, federal law requires employers to confirm that the individual is legally authorized to work in the United States. This involves completing Form I-9 (Employment Eligibility Verification) for every employee, regardless of their citizenship status. The process is simple but time-sensitive: the employer section of the form must be completed within three business days of the employee’s start date.
Here’s how it works: the employee completes Section 1 of Form I-9 on or before their first day of work. After that, the employer fills out Section 2 within three business days, using original, unexpired documents to confirm both the employee’s identity and work authorization. Employees can present either:
- One document from List A (e.g., U.S. Passport or Permanent Resident Card), OR
- One document from List B (proving identity, such as a Driver’s License) and one document from List C (proving work authorization, such as a Social Security card).
It’s important to review the original documents – photocopies are not acceptable.
Although you don’t submit Form I-9 to the government, you must retain it in your records. Store these forms separately from other personnel files and keep them for three years after the hire date or one year after the employee leaves, whichever is later. Mistakes or failure to properly maintain I-9 forms can lead to fines ranging from $252 to $2,507 per form [2].
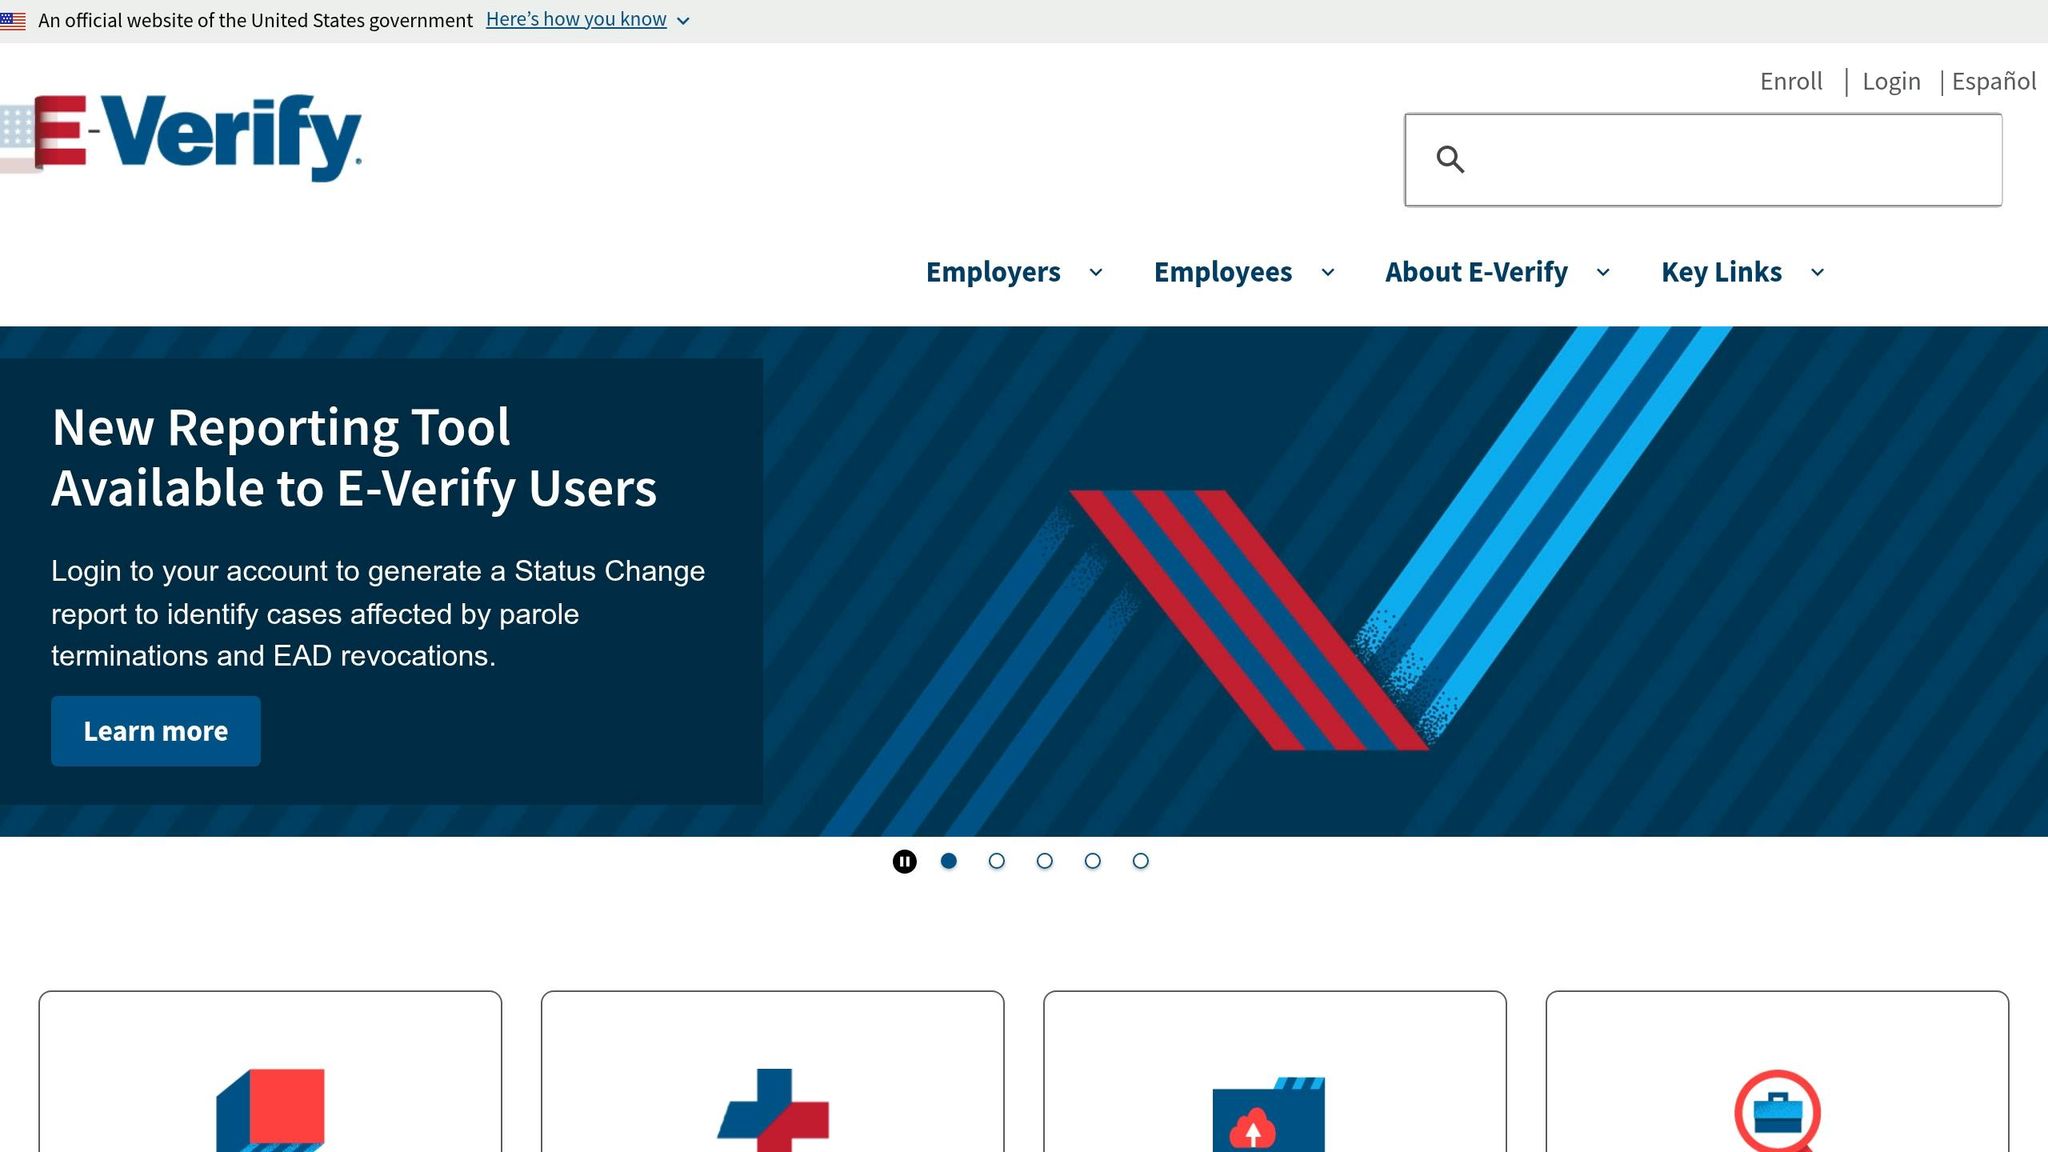
To add an extra layer of security, many employers use E-Verify, a voluntary online system managed by U.S. Citizenship and Immigration Services (USCIS). This system electronically confirms employment eligibility and is mandatory in certain states or for specific federal contractors [6]. Modern payroll tools like Gusto or ADP often include digital I-9 workflows and E-Verify integration, helping employers meet deadlines and securely store critical documents.
Once you’ve confirmed work eligibility, you’re ready to move on to Step 4: setting up payroll.
Step 4: Set Up Payroll
After confirming your employee’s work eligibility, the next priority is setting up payroll. This ensures employees are paid accurately and on time while keeping your business compliant with tax regulations. To get started, you’ll need to gather key documents, decide on a payroll system, and establish a payment schedule.
Begin by collecting Form W-4 (Employee’s Withholding Certificate) from your new hire before or on their first day. This form determines how much federal income tax to withhold based on their filing status and dependents. Some states, like California, may also require a state-specific withholding form, such as Form DE 4. Additionally, you’ll need the employee’s Social Security Number, current address, and direct deposit information (bank account and routing numbers).
Next, select a payroll schedule. Common options include weekly, bi-weekly (every two weeks), or semi-monthly (twice a month). The choice should align with your cash flow and any state requirements, as some states mandate minimum pay frequencies. To streamline payroll management, consider opening a dedicated payroll bank account separate from your main business account. This can make it easier to track payroll expenses and ensure funds are available for wages and tax withholdings.
Manual Payroll vs. Payroll Software
When it comes to processing payroll, you can either handle it manually or use payroll software.
- Manual Payroll: This involves calculating wages, tax withholdings, and deposits by hand or using spreadsheets. Although it avoids software subscription costs, manual processing is time-intensive and increases the risk of errors. You’ll need to stay on top of ever-changing tax rates, deadlines, and compliance requirements to avoid penalties from the IRS.
- Payroll Software: Automated systems simplify the process by calculating taxes, filing federal and state forms, managing direct deposits, and generating year-end W-2 forms. Many platforms also offer employee self-service portals where team members can access pay stubs and tax documents. While software requires a monthly subscription fee, the time saved and reduced risk of compliance issues often make it the better option for first-time employers.
"Rather than managing this yourself, consider using a payroll service or online payroll app. Doing so can simplify payroll and tax withholding, and ensure the process is completed correctly." – SCORE
Comparing Gusto, QuickBooks Payroll, and ADP RUN
Here’s a breakdown of three popular payroll platforms for small businesses:
- Gusto: Known for its simple interface and straightforward pricing, Gusto starts at $49 per month plus $6 per employee. It offers a complete solution for payroll, benefits, and HR compliance, and is trusted by over 400,000 businesses [8].
- QuickBooks Payroll: Starting at $45 per month plus $6 per employee, this platform integrates seamlessly with QuickBooks accounting software, eliminating the need for double data entry. It also offers same-day direct deposit, though features like local tax filing and multi-state support are only available on higher-tier plans [8][9].
- ADP RUN: With over 70 years of experience, ADP RUN is ideal for businesses with complex payroll needs or plans for rapid growth. Pricing is quote-based (estimated at $79 per month plus $4 per employee), and it includes 24/7 professional support. However, the interface may take some time to learn compared to Gusto [7][9].
| Feature | Gusto | QuickBooks Payroll | ADP RUN |
|---|---|---|---|
| Best For | All-in-one HR & Payroll | Accounting Integration | Scalability & Complex Needs |
| Starting Price | $49/mo + $6 per employee | $45/mo + $6 per employee | Custom (est. $79/mo + $4 per employee) |
| Ease of Use | High | Moderate | Moderate |
| Direct Deposit | Next-day / 2-day | Same-day / Next-day | Multiple options |
| Tax Filing | Automated (All 50 states) | Automated (local/multi-state on higher tiers) | Automated (global capabilities) |
Automated payroll software can also handle tasks like reporting new hires to your state registry (usually required within 20 days), maintaining payroll records for three years, and storing tax records for four years. Plus, it ensures you never miss a tax filing deadline [2]. Once your payroll system is in place, you’re ready to tackle employer tax obligations in Step 5.
Step 5: Know Your Employer Tax Obligations
Once your payroll is up and running, it’s crucial to understand the taxes you’re now responsible for as an employer. Unlike when you were managing taxes as a solo LLC owner, hiring employees means handling both withholdings and employer-matched contributions. While payroll software can help automate much of this, staying informed about what taxes you owe and when ensures accurate budgeting for the true cost of having employees.
FICA taxes (Federal Insurance Contributions Act) include Social Security and Medicare. As an employer, you’ll need to withhold 6.2% for Social Security and 1.45% for Medicare from each employee’s paycheck. On top of that, your business must match these amounts, bringing the total to 15.3%. For 2026, Social Security tax applies only to the first $184,500 of wages per employee [11]. If an employee earns more than $200,000 annually, you’ll also need to withhold an extra 0.9% for Medicare from their wages – this additional amount is not matched by the employer [14].
Beyond FICA, there are employer-only taxes to account for. FUTA (Federal Unemployment Tax Act) is one such tax, assessed at 6% on the first $7,000 of each employee’s wages. However, most employers qualify for a 5.4% credit by paying state unemployment taxes on time, effectively lowering the FUTA rate to 0.6%, or about $42 per employee annually [11][12]. SUTA (State Unemployment Tax) rates vary depending on your state and your business’s claims history. New employers typically start with a default rate [2].
You’ll also need to withhold federal income tax based on the W-4 form submitted by each employee. If your state collects income tax (nine states don’t), you’ll need to withhold that as well. These amounts depend on the employee’s filing status and number of dependents [2].
Once you’ve calculated and withheld the necessary taxes, meeting filing deadlines is critical to staying compliant. For FICA taxes and withheld income tax, submit Form 941 quarterly by the last day of the month following each quarter (April 30, July 31, October 31, and January 31) [13]. At the end of the year, file Form 940 for FUTA by January 31. By this same date, provide each employee with a W-2 that summarizes their total wages and taxes withheld [11][13]. Keep in mind, the IRS has imposed over $18.9 billion in penalties for federal tax deposit issues in a recent fiscal year, and missing payroll tax deadlines can result in penalties of up to 15% of the unpaid deposit [11].
| Tax Type | Who Pays? | 2026 Rate | Filing Form |
|---|---|---|---|
| FICA (Social Security) | Employer & Employee (6.2% each) | 12.4% total on first $184,500 | Form 941 (Quarterly) |
| FICA (Medicare) | Employer & Employee (1.45% each) | 2.9% total; no wage cap | Form 941 (Quarterly) |
| Additional Medicare | Employee only | 0.9% on wages over $200,000 | Form 941 (Quarterly) |
| FUTA | Employer only | 6% (often 0.6% after credit) on first $7,000 | Form 940 (Annual) |
| SUTA | Employer only | Varies by state | State-specific |
| Federal Income Tax | Employee (withheld) | Based on W-4 | Form 941 (Quarterly) |
When budgeting, plan for total costs to be about 1.25 to 1.4 times an employee’s base salary, factoring in taxes and insurance [5]. For instance, hiring someone with a $65,000 salary in New York could mean an additional $5,414 in employment taxes, while the same salary in California might result in $5,428 in extra costs [4].
sbb-itb-ba0a4be
Step 6: Get Workers’ Compensation Insurance
If you’re hiring employees, workers’ compensation insurance is a must in nearly every state. This coverage helps protect both you and your employees by covering medical bills and lost wages due to work-related injuries or illnesses. Skipping this requirement can lead to serious consequences, including fines exceeding $1,000 per day, business closures, or even criminal charges [2]. It’s a key part of setting up your LLC as an employer, which involves following specific LLC formation requirements.
To get started, check your state’s specific requirements. A quick online search like "[Your State] workers’ comp requirements" or a visit to your state’s Department of Labor or Department of Insurance website will guide you. Plan ahead – start gathering quotes at least 60 days before you hire your first employee [5]. Premiums vary widely, typically ranging from $0.50 to $3.00 per $100 of payroll. Your industry plays a big role here; for instance, an office-based LLC will usually pay much less than a construction business [2].
Most LLCs purchase coverage through private insurers or brokers. If your business is considered high-risk or private insurers decline coverage, some states offer state-run funds as an alternative. Additionally, many payroll platforms provide pay-as-you-go plans, syncing your premiums with your payroll schedule. While Texas is one of the few states where workers’ compensation is optional, it’s still smart to have this coverage to safeguard your LLC [2].
Once you’ve secured a policy, make sure to display the required workers’ compensation poster prominently in your workplace. Add new employees to your policy within their first week. You can use tools like the Department of Labor’s Poster Advisor to find and print the necessary workplace notices [4] [5].
Finally, keep all your insurance documents well-organized and easy to access. State agencies may audit your records to ensure compliance, so it’s a good idea to retain these files for at least four years [1].
Step 7: Create an Employment Agreement
Once you’ve secured workers’ compensation insurance, it’s time to draft an employment agreement. This document is crucial for protecting both you and your employee by clearly defining key details like the job title, responsibilities, compensation (whether salary or hourly wage), payment schedule, and any benefits offered – such as health insurance, paid time off, or retirement contributions. It’s an essential part of setting up your LLC as an employer, alongside tasks like obtaining an EIN, setting up payroll, and ensuring tax compliance.
Make sure to include an at-will clause, which allows either party to end the employment relationship at any time. Also, specify whether the position is exempt or non-exempt to comply with wage laws.
For added protection, include clauses that address confidentiality, non-disclosure, and intellectual property. These help safeguard your business by protecting trade secrets and ensuring ownership of any work products. Additionally, outline termination procedures, including notice periods and details about when benefits like health insurance kick in – often after a 90-day probationary period.
Avoid relying on generic templates, as these might not account for state-specific laws. For instance, California has strict limitations on non-compete agreements, so any such clauses must comply with local regulations.
A well-drafted employment agreement not only sets clear expectations but also provides legal protection for both parties. Be sure to keep signed copies organized for audits or resolving disputes.
Once your employment agreement is ready, the next step is to ensure you properly classify workers as independent contractors or employees to avoid any IRS-related issues.
Employee vs Contractor: Get the Classification Right
Getting worker classification wrong can hit your LLC hard. The IRS relies on a three-part common law test to figure out whether someone is an employee or an independent contractor. This test focuses on behavioral control, financial control, and the type of relationship [15].
- Behavioral control examines whether you dictate how tasks are done. This includes setting work hours, providing detailed instructions, or requiring the use of your tools.
- Financial control looks at whether the worker handles their own business expenses, invests in equipment, or has a chance to make a profit or take a loss.
- Type of relationship considers things like written contracts, benefits (like health insurance or paid time off), and whether the engagement feels permanent [15].
Understanding these distinctions is key to running your LLC in compliance with tax and labor laws.
"Anyone who performs services for you is your employee if you can control what will be done and how it will be done." – IRS [16]
Misclassifying an employee as a contractor can lead to unpaid employment taxes, penalties, interest, and even personal liability under the Trust Fund Recovery Penalty [15]. Some states take it a step further, enforcing criminal penalties for not providing workers’ compensation. With around 11.9 million independent contractors as of 2023, and about 32% of companies leaning toward contract workers to cut costs, it’s clear why this issue matters [17].
| Feature | W-2 Employee | 1099 Independent Contractor |
|---|---|---|
| Tax Withholding | Employer withholds income, Social Security, and Medicare taxes | No withholding; contractor pays self-employment taxes |
| Employer Taxes | Employer pays matching FICA (7.65%) and FUTA | Employer pays no employment taxes |
| Work Schedule | Set by the employer | Set by the contractor |
| Tools & Resources | Provided by the employer | Provided by the contractor |
| Benefits | Often includes health insurance, PTO, and retirement plans | Not eligible for company benefits |
| Reporting | Reported via Form W-2 | Reported via Form 1099-NEC (if paid $600+) |
This table highlights the key differences, helping you stay on the right side of compliance.
If you’re unsure about classification, the IRS offers a solution: file Form SS-8 for an official determination. But keep in mind, this process can take six months or longer [15]. Also, remember that the IRS and courts look at actual work practices, not just the wording in your contract. When in doubt, it’s safer to classify the worker as an employee.
Getting worker classification right is critical for keeping your LLC compliant and avoiding steep penalties from the IRS.
Non-US LLC Owners Hiring US Employees
For non-US LLC owners, the process of hiring US-based employees is similar to that of domestic owners, but there are additional steps to handle. One of the first requirements is obtaining an Employer Identification Number (EIN). This is essential for reporting payroll taxes and meeting federal withholding obligations [2][4].
If you’re a foreign owner without a US Taxpayer Identification Number (like an SSN or ITIN), the EIN application process is slightly different. You’ll need to submit Form SS-4 by mail or fax, which can take several weeks. To speed things up and access online IRS services, consider applying for an ITIN first. Services like BusinessAnywhere can assist with the ITIN application and offer packages like the Digital Nomad Kit, which includes EIN setup, registered agent services, and compliance support tailored for non-US entrepreneurs starting a US business.
Once you’ve secured your EIN, the next steps align closely with those for domestic LLC owners. You’ll need to:
- Register with the employee’s state labor department for State Unemployment Tax (SUTA) [2].
- Set up federal and state tax withholdings using Form W-4.
- Verify the employee’s work eligibility with Form I-9.
- Handle payroll tax obligations, including Social Security (6.2%), Medicare (1.45%), and FUTA [2][3].
Be aware that late filings of Form I-9 can lead to federal fines ranging from $252 to $2,507 per form [2].
To simplify payroll management, consider using a payroll provider. Options like Gusto (starting at $40/month plus $6/month per employee) or Rippling (starting at $8 per employee/month) can automate tax calculations, filings, and state-specific new hire reporting. This reduces the chances of costly errors [2][10]. Alternatively, if you want to avoid the administrative work entirely, an Employer of Record (EOR) like Deel can hire the employee on your behalf for $599 per month per worker, ensuring compliance with all local tax and labor laws [10].
Lastly, maintain thorough records of all payroll transactions, tax filings, and I-9 forms. The IRS requires employment tax records to be kept for at least four years after taxes are paid, while I-9 forms must be retained for three years after the employee’s hire date or one year after termination, whichever comes later [2].
Conclusion
Hiring your first employee as an LLC is a big step, but it also comes with important legal and administrative responsibilities. From securing your Employer Identification Number (EIN) and registering with state labor agencies to verifying work eligibility using Form I-9 and setting up a compliant payroll system, every step plays a role in protecting both your business and your employees. Keep in mind, the IRS requires you to maintain employment tax records for at least four years after taxes are paid, and misclassifying workers could result in fines reaching up to $25,000 per worker in certain states [3]. As Eagle Rock CFO puts it, "Get it wrong, and you face unhappy employees, tax penalties, and compliance headaches" [10]. A methodical, step-by-step approach can help you navigate these challenges effectively.
Fortunately, there are tools to make this process easier. Automated payroll software, like Gusto (starting at $40/month plus $6 per employee), can handle tax calculations and filings, minimizing the risk of manual errors. Don’t forget to secure workers’ compensation insurance before your employee’s first day to protect yourself from potential liabilities. Drafting clear employment agreements and keeping well-organized records will also ensure you’re prepared for audits and legal requirements from the start.
For non-US LLC owners, the process is similar but includes additional steps like obtaining an ITIN and meeting state-specific rules. Services like BusinessAnywhere can simplify this process by offering EIN applications ($97), registered agent services (starting at $147/year), and tailored compliance support for remote entrepreneurs through their Digital Nomad Kit. These resources can help streamline the hiring process and keep your business on track.
FAQs
Do I need an EIN before hiring?
Yes, you need an Employer Identification Number (EIN) before hiring employees. This number is essential for reporting payroll taxes and ensuring compliance with federal regulations. If your LLC plans to hire employees, getting an EIN is a necessary first step.
What state registrations do I need?
When you’re ready to hire your first employee as an LLC, there are a few key steps you’ll need to take. First, you’ll usually need to register with your state’s labor department to obtain an employer ID number for unemployment insurance (often referred to as SUTA). Additionally, if your state has a withholding tax, you’ll need to register for that as well.
Many states also require you to register for workers’ compensation insurance to cover your employees in case of workplace injuries. Since requirements and processes can vary significantly depending on where you’re located, it’s a good idea to check your state’s employer registration portal for specific details.
Employee or contractor – which is safer?
Employees tend to be a safer option when it comes to IRS compliance because they fall under well-defined classification rules, minimizing the risk of misclassification. That said, hiring employees comes with additional responsibilities, including payroll taxes, workers’ compensation, and other legal obligations.
On the other hand, contractors are easier to manage in some respects, but the risks are higher if they’re misclassified. The IRS uses specific criteria – like how much control you have over the worker’s tasks and financial arrangements – to determine the correct classification.
If you’re uncertain about how to classify workers, it’s a good idea to review state-specific regulations or seek legal advice to ensure you’re staying compliant.